Ever wondered how to craft your own unique creations within the expansive world of Roblox? Learning how to make a model Roblox opens up endless possibilities for game development and personalization. This comprehensive guide is specifically designed to walk you through every essential step, from understanding basic tools to mastering advanced techniques. We will explore the intuitive Roblox Studio interface, transforming simple parts into intricate structures. Discover expert tips for optimizing your models, ensuring they are efficient and visually appealing for all players. Whether you are a complete beginner or looking to refine your existing skills, this informational resource provides actionable advice. Unlock your creative potential and start building impressive models today, contributing to the vibrant Roblox community. Making models can significantly enhance your game’s appeal. This guide promises to boost your Roblox development journey effectively.
how to make a model roblox FAQ 2026 - 50+ Most Asked Questions Answered (Tips, Trick, Guide, How to, Bugs, Builds, Endgame)
Welcome to the ultimate living FAQ for mastering Roblox model creation in 2026! This comprehensive guide is your go-to resource, updated with the latest tips, tricks, and solutions for building stunning assets in Roblox Studio. Whether you're a beginner struggling with basic shapes or an experienced developer seeking advanced optimization strategies, we've got you covered. From understanding core concepts to troubleshooting common bugs and exploring endgame building techniques, this FAQ will empower your creative journey. Dive in to unlock your full potential and craft amazing experiences for the Roblox community.
Beginner Questions on Roblox Model Creation
How do I start making my first model in Roblox Studio?
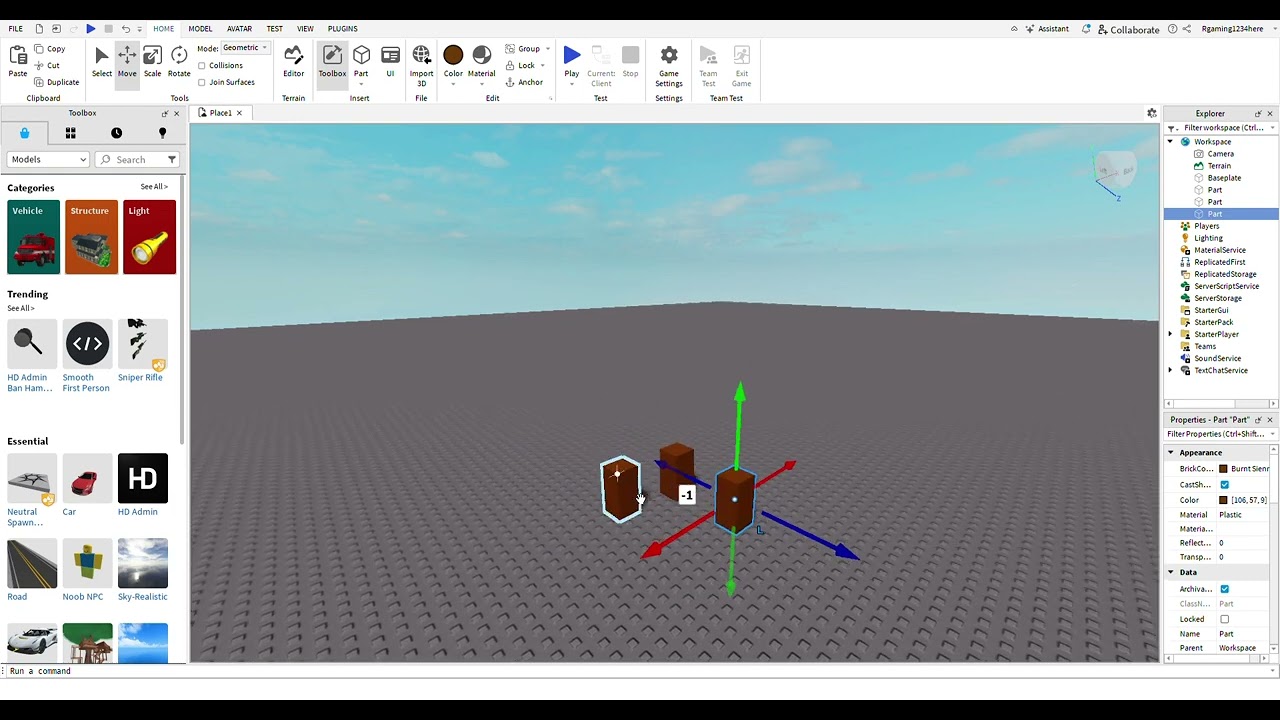
To begin, open Roblox Studio and create a new baseplate. In the Home tab, click 'Part' to insert a basic block. Use the 'Move', 'Scale', and 'Rotate' tools to manipulate its position and size. Experiment with changing its color and material in the 'Properties' window to personalize it. This hands-on approach builds foundational skills quickly.
What are the essential tools for basic model building?
The essential tools include 'Select', 'Move', 'Scale', and 'Rotate', found in the Home tab. These allow you to pick, position, size, and orient parts. The 'Explorer' window helps organize your objects, while the 'Properties' window lets you adjust specific attributes like color, transparency, and material. Mastering these basics is fundamental for all builders.
Can I use pre-made assets from the Toolbox in my models?
Yes, absolutely! The Toolbox offers a vast library of pre-made assets, including models, meshes, and scripts, created by Roblox and other community members. You can drag and drop these into your game, then modify them to suit your needs. Remember to always inspect models from the Toolbox for optimization and unwanted scripts before integrating them fully.
How do I combine multiple parts into a single model?
To combine parts, select all the desired parts in your workspace or the Explorer window. Then, right-click on any selected part or in the Explorer and choose 'Group'. This creates a new 'Model' object in the Explorer, making it easier to manage and move your creation as one cohesive unit. Rename your model for better organization.
Advanced Building & Optimization Techniques
What is the Union and Negate feature used for in Roblox Studio?
Union and Negate are powerful tools for creating complex custom shapes. 'Union' combines selected parts into a single mesh, streamlining geometry and reducing part count. 'Negate' transforms a part into a negative volume, which, when unioned with another part, effectively cuts a hole or creates an intricate indentation. They allow for detailed, custom forms.
How can I optimize my Roblox models for better performance?
Optimize models by reducing their part count, especially for complex structures. Use 'Union' operations to merge overlapping parts. Consider importing lower-polygon meshes for intricate designs. Avoid unnecessary details that won't be visible. Regularly test your game on various devices to identify and address performance bottlenecks early, ensuring a smooth player experience.
Are external 3D modeling programs like Blender useful for Roblox?
Yes, external 3D modeling programs like Blender are incredibly useful for creating highly detailed and unique meshes for Roblox. They offer advanced sculpting, texturing, and animation capabilities beyond Roblox Studio's built-in tools. You can export these creations as .fbx or .obj files and import them into Studio, significantly expanding your model design possibilities.
Myth vs Reality: Does having many parts always cause lag?
Myth: While having many parts *can* contribute to lag, it's not always the sole cause. Reality: Performance issues often stem from unoptimized parts, excessive unions, high polygon counts in meshes, or unanchored objects. Properly optimized models, even with a reasonable part count, typically perform well. Focus on efficiency over just raw part quantity.
Myth vs Reality: Is it better to always Union parts than keep them separate?
Myth: Always unioning parts isn't necessarily better. Reality: While 'Union' can reduce part count and improve performance for complex shapes, overusing it can create inefficient geometry, making models harder to edit and sometimes increasing polygon count unnecessarily. Use 'Union' strategically where it genuinely simplifies and optimizes the model's structure. Often, keeping parts separate and well-grouped is sufficient.
Sharing and Collaboration Issues
How do I share my custom models with other developers or the community?
To share your model, select it in the Explorer, right-click, and choose 'Save to Roblox.' In the pop-up window, provide a descriptive name and description. Crucially, check the 'Allow Copying' option to make it public. This publishes your model to the Roblox Toolbox, allowing other creators to find and use your work, fostering community collaboration.
What should I consider when using models from the Roblox Toolbox?
When using Toolbox models, always inspect them thoroughly. Check for unwanted scripts within the model's components, as these can introduce security risks or unexpected behaviors. Verify the model's part count and geometry for optimization. Modify or re-texture it to fit your game's aesthetic. Proper vetting ensures asset quality and project integrity.
Myth vs Reality: Are all free models in the Toolbox safe to use?
Myth: Not all free models are safe. Reality: While many creators share high-quality assets, some free models might contain malicious scripts, viruses, or be poorly optimized. Always check the model's contents, particularly for unknown scripts or numerous hidden parts. Download from trusted creators and preview models carefully to protect your game.
General Workflow and Troubleshooting
How can I quickly duplicate a model in Roblox Studio?
You can quickly duplicate a model by selecting it in the workspace or Explorer window and pressing Ctrl+D (Cmd+D on Mac). Alternatively, you can right-click the model in the Explorer and choose 'Duplicate.' This creates an exact copy of your model, allowing for efficient iteration and placement of multiple identical assets within your game world.
What should I do if my model falls apart in-game?
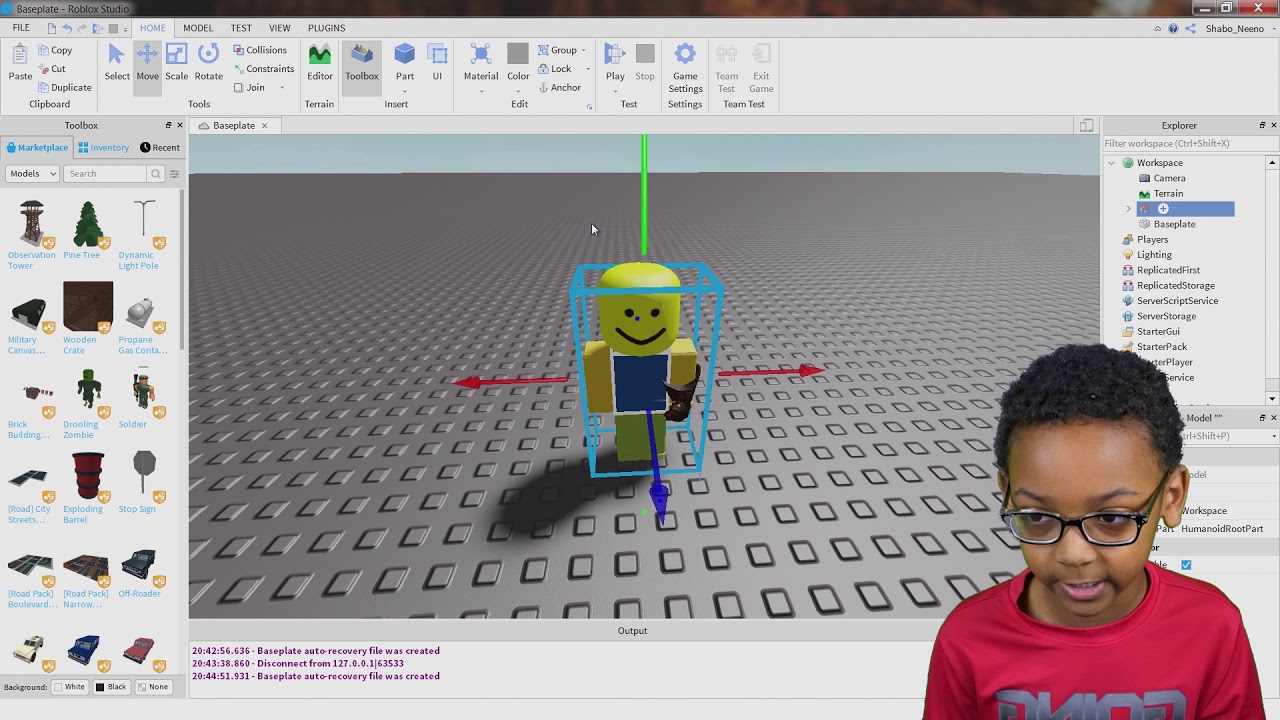
If your model falls apart, it's likely due to unanchored parts. Select all the main components of your model in the Explorer and ensure their 'Anchored' property in the 'Properties' window is checked. This prevents them from being affected by gravity or physics. If parts are meant to move, use constraints like 'WeldConstraint' instead of just grouping.
Myth vs Reality: Does a model's material affect its performance?
Myth: A model's material type has a significant direct impact on performance. Reality: While some complex materials (like 'Glass' with transparency) might have a minor performance implication, the material itself usually has a negligible impact compared to factors like part count or mesh complexity. Optimizing geometry is far more crucial for overall game performance than material choice.
Still have questions?
If you're still curious about making incredible models, check out our other guides on scripting custom functionality or designing immersive environments. Your journey as a Roblox developer is just beginning!
Guide How to Make a Model in Roblox Studio Easily
Have you ever looked at incredible Roblox games and thought, "How do they make those amazing models?" Many aspiring developers face this exact question. Crafting your own unique models is a fundamental skill in Roblox Studio, allowing you to bring your imaginative ideas to life. This guide will walk you through the entire process, providing actionable steps to help you build stunning creations. We're going to dive deep into the world of Roblox model creation, ensuring you gain the confidence to design anything you can envision.
Creating compelling content for Roblox is an art form. Mastering how to make a model Roblox allows you to customize your games like a true professional. You can design everything from intricate buildings and detailed characters to custom props and environmental elements. This foundational knowledge is crucial for anyone aiming to develop successful and engaging experiences. Let's unlock your creative potential together, making your game stand out from the crowd.
The Core of Creation Understanding Roblox Models
Before we start building, what exactly is a model in Roblox Studio? Simply put, a model is a collection of parts or other models grouped together as a single unit. Think of it like a folder on your computer containing multiple files. This grouping is essential for organization, manipulation, and portability within your game. Learning how to make a model Roblox effectively begins with grasping this core concept.
Models are fundamental because they allow you to manage complex structures with ease. Instead of moving hundreds of individual parts, you can move, rotate, or scale an entire creation simultaneously. This makes game development much more efficient and less prone to errors. Understanding this basic structure is your first step towards becoming a proficient Roblox builder, paving the way for advanced techniques.
Getting Started with Roblox Studio Your Workspace
Your journey into model making begins in Roblox Studio, the powerful development environment. When you open a new place, you will see a default baseplate, which is your canvas. Familiarize yourself with the various windows like the Explorer, Properties, and Toolbox. These are your primary tools for creating and managing models. Navigating this interface is vital for how to make a model Roblox seamlessly.
The Explorer window shows all objects in your game, organized hierarchically. The Properties window lets you modify an object’s attributes, such as color, size, and position. The Toolbox provides access to a vast library of pre-made assets, which you can use or learn from. Taking the time to understand these panels will drastically improve your workflow and efficiency.
Building Blocks Basic Parts for Your Roblox Model
Every model starts with basic parts. In Roblox Studio, you can insert various shapes like blocks, spheres, wedges, and cylinders from the Home tab. These are the foundational elements you will manipulate to construct your desired model. Knowing how to insert and modify these parts is crucial for any builder. It’s like gathering your raw materials before starting construction.
Once inserted, you can use the Move, Scale, and Rotate tools to position and resize these parts. Experiment with different shapes and sizes to understand their versatility. Changing a part's color or material in the Properties window can instantly transform its appearance. Don't be afraid to play around; experimentation is key to mastering how to make a model Roblox effectively.
Connecting Parts Using Joints and Anchors for Models
After creating individual parts, you will want to connect them to form a cohesive structure. Roblox Studio offers various methods for this, including welds and constraints. For most static models, simply grouping parts will automatically create welds if they are touching. Anchoring parts is also crucial, especially for objects that shouldn't fall apart or move unintentionally. Always anchor your main model components.
Anchoring prevents parts from being affected by gravity, ensuring they stay in their desired position. You can find the Anchor property in the Properties window when a part is selected. For dynamic models, like moving doors or spinning fans, you might use more advanced constraints. Understanding these connections is essential for stable and functional models.
Grouping Your Creations The Essence of a Roblox Model
Once your parts are assembled, the next critical step is to group them into a model. Select all the parts you want to include in your model by clicking and dragging a box around them, or by holding Shift and clicking each part in the Explorer window. Then, right-click on one of the selected parts or in the Explorer and choose 'Group'. You will see a new 'Model' object appear in the Explorer. This is a vital step in how to make a model Roblox properly.
Grouping makes your creation manageable. You can now move, rotate, and scale the entire model as one unit. Rename your model in the Explorer to something descriptive, like "MyAwesomeHouse" or "CustomTree." This organization is incredibly important, especially as your game grows in complexity. Keeping your workspace tidy will save you countless headaches down the line.
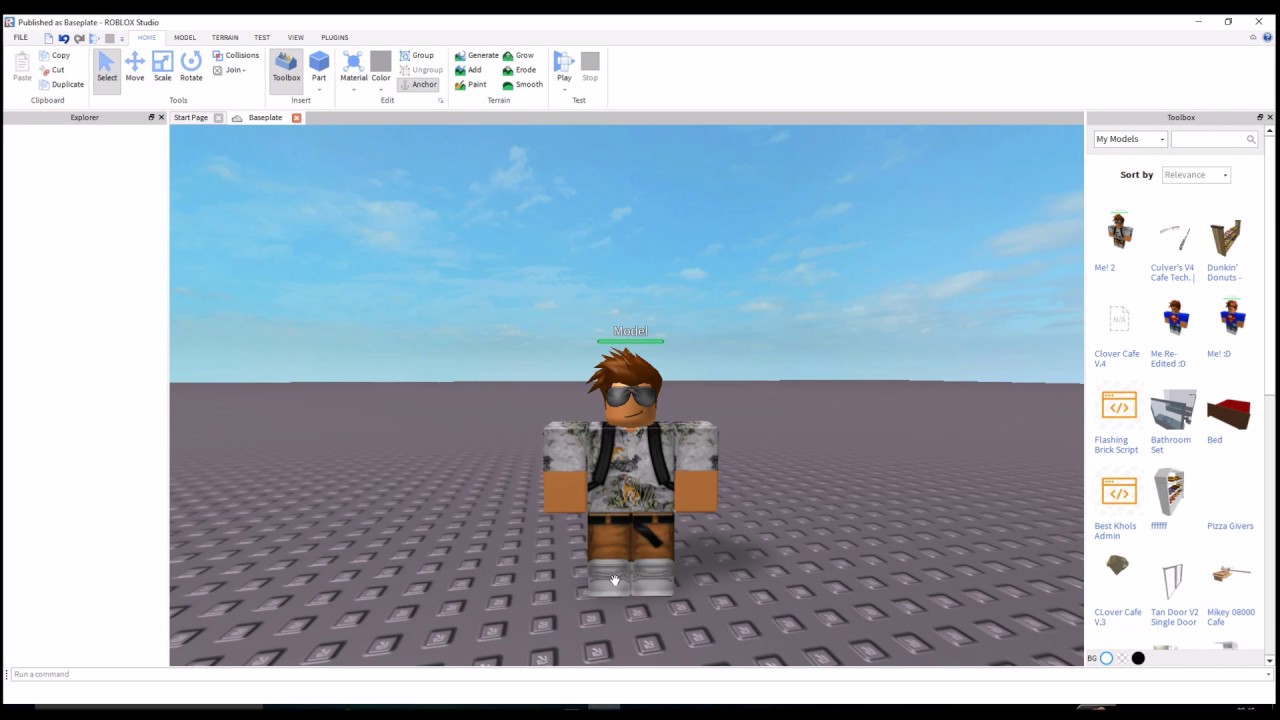
Saving Your Roblox Model to the Toolbox
You have built a fantastic model; now, let's save it! To save your model for future use or to share it with the community, select the model in the Explorer. Right-click and choose 'Save to Roblox.' A dialog box will appear where you can name your model, add a description, and choose whether to make it public. Saving to Roblox uploads it to your personal Toolbox assets. This allows others to use your creations and lets you easily reuse them in other games. Always remember to save your work frequently.
Making your model public can contribute to the vast Roblox asset library, earning you respect within the community. When you save a model, consider creating an appealing thumbnail image that accurately represents your creation. A good thumbnail attracts more attention in the Toolbox. This sharing aspect is a rewarding part of learning how to make a model Roblox and collaborate with others effectively.
Advanced Modeling Techniques Elevating Your Roblox Builds
Once you are comfortable with basic model creation, it is time to explore advanced techniques. Using the Union and Negate operations can create complex custom shapes from simple parts. Union combines selected parts into a single, cohesive shape, removing overlapping geometry. Negate creates a negative part, effectively cutting away from another part when unioned. These tools are powerful for intricate designs. This truly enhances your ability to create detailed models.
Meshes imported from external 3D software like Blender offer unparalleled flexibility. While more advanced, learning to create and import custom meshes can take your models to the next level. Roblox also provides various plugins in the Toolbox that can assist with tasks like terrain generation, building tools, and object alignment. Explore these tools to expand your building repertoire greatly.
Pro Tips for Roblox Model Optimization
As you create more complex models, optimization becomes crucial. High-detail models with many parts can cause lag, especially on lower-end devices. Reduce the number of parts where possible by using simpler geometry or unions. Check for unnecessary overlapping parts. Optimizing your models ensures a smooth experience for all players, making your game more enjoyable. This is a critical skill for any serious developer.
Consider the polygon count of your models, particularly with imported meshes. Lower polygon counts generally result in better performance. Utilize texture atlases instead of multiple individual textures to reduce draw calls. Always test your game on various devices to identify potential performance bottlenecks early. A well-optimized game runs smoothly, attracting and retaining more players.
What Others Are Asking? Common Roblox Model Queries
We often hear players asking for guidance on model creation. What's the best way to get started with custom models in Roblox Studio? Many people wonder about the most efficient workflows or how to troubleshoot common building issues. Addressing these frequently asked questions can help streamline your model-making journey. Let's tackle some of the most common questions that arise.
Understanding community queries can guide your learning process. Whether you're curious about specific tools or best practices for sharing, these answers provide clear, concise information. This section aims to resolve those nagging questions, giving you confidence as you build within Roblox Studio. After all, everyone wants to create fantastic experiences.
How do you make a good model in Roblox Studio?
To make a good model, focus on clear purpose, efficient part count, and visual appeal. Use proper grouping, anchoring, and a consistent art style. Begin with simple shapes and gradually add detail. Optimize for performance by reducing unnecessary complexity. Always test your model in-game for functionality and appearance across different devices. Practice regularly to refine your skills.
What are models in Roblox Studio?
Models in Roblox Studio are collections of parts, or other models, grouped together as a single object. They provide a structured way to manage complex creations, allowing developers to move, scale, and manipulate multiple components simultaneously. This grouping enhances organization within the Explorer window, making game development more efficient and manageable for builders of all skill levels.
Can you make your own models in Roblox?
Yes, absolutely! Roblox Studio is designed specifically for users to create their own models and assets. You can build anything from simple props to intricate environments and characters using its built-in tools. Many developers even import custom meshes from external 3D software to achieve unique designs, offering endless creative possibilities. Your imagination is the only limit.
How do I create an object in Roblox Studio?
To create an object, go to the Home tab and click 'Part' or select a specific shape like 'Block' or 'Sphere'. This inserts a basic part into your workspace. You can then use the Move, Scale, and Rotate tools to position and resize it. Modify its appearance using the Properties window to change color, material, and other attributes, building your desired form.
How do I save a model in Roblox Studio?
To save a model, select it in the Explorer window, right-click, and choose 'Save to Roblox.' A pop-up will prompt you to provide a name, description, and decide if it should be public. This uploads your creation to your personal Toolbox assets, making it accessible for future projects or for others to use. Saving frequently prevents loss of your valuable work.
What is the difference between a part and a model in Roblox?
A part is a single, fundamental building block like a block or sphere with its own properties. A model is a collection of multiple parts (or even other models) grouped together into a single, cohesive unit. Models allow for easier manipulation and organization of complex structures, treating many parts as one item, whereas a part is a solitary component.
Common Mistakes and How to Avoid Them in Model Building
Even experienced builders can fall into common pitfalls. One frequent mistake is not anchoring parts, leading to objects falling apart in-game. Always ensure your foundational parts are anchored unless you intend for them to be dynamic. Another error is creating overly complex models with too many parts, which can cause performance issues. Strive for efficiency and simplicity where possible. Learning from these missteps is a key part of mastering how to make a model Roblox effectively.
Ignoring good organization in the Explorer window is another common oversight. Unnamed or haphazardly arranged parts make it incredibly difficult to navigate and modify your game later on. Always rename your models and parts descriptively. Also, avoid relying solely on free models from the Toolbox without understanding their construction, as they might be unoptimized or contain scripts you don't want. Building smart is building effectively.
The Future of Roblox Models Studio Updates and Beyond
Roblox Studio is constantly evolving, with frequent updates introducing new tools and features. Keeping an eye on these patch notes can give you an edge in your model-making endeavors. New materials, improved lighting, and enhanced building tools are regularly added, expanding your creative possibilities. Staying informed allows you to leverage the latest advancements. This continuous learning keeps your skills sharp and current.
Embrace new functionalities as they emerge to refine your workflow. The future of Roblox development promises even more powerful features for creators, making complex model building more accessible. The community's passion drives innovation, ensuring that the platform continues to grow. By actively engaging with updates, you ensure your models remain cutting-edge. This dedication will propel your building journey forward.
Key Highlights Summary for Making Roblox Models
- **Organize with Grouping:** Always group related parts into models for better management and portability.
- **Anchor Wisely:** Use the Anchor property to prevent parts from falling or moving unintentionally.
- **Optimize Performance:** Reduce part count and simplify geometry to ensure smooth gameplay.
- **Utilize Unions/Negates:** Combine and subtract shapes for complex and custom geometries.
- **Save Frequently:** Regularly save your models to Roblox to prevent data loss and allow for reuse.
- **Explore Plugins:** Leverage community-made plugins for specialized building tasks and efficiency.
- **Practice and Experiment:** The best way to learn is by doing, so constantly build and try new techniques.
Codes: Utilize plugins for advanced modeling functions. Tips: Always group parts into models. Pros: Enhances game visuals, fosters creativity. Cons: Can be time-consuming for complex designs. Best practice: Save frequently and use version control. Essential: Learn about proper collision and anchoring.
35


How To Create A Model On Roblox Studio In Depth Guide Roblox . Easiest Way To Create Models For Roblox Games Import Sloyd Model Into Roblox.webp. How To Make Models In Roblox Studio 2025 YouTube . Roblox Studio 06 Make Your Own Models And Manage It In The Toolbox . Get Blender Models To Roblox HOW TO MODEL Roblox Studio YouTube


How To Make Models On Roblox Studio 2025 YouTube . How To Make A Model On Roblox YouTube . How To Make A Model In Roblox Studio YouTube . 3D Roblox Meshy Roblox Window.webp. How To Make Roblox Models In Blender H Ng D N T O M H Nh 3D Chuy N


How To Make MODELS Of YOURSELF ROBLOX YouTube . How To Create Your Own Roblox Models Tutorial For Roblox RBLX Tutorials . How To Make A Model In Roblox Studio YouTube . Roblox Studio Tutorial 2 How To Create First Model In Roblox Studio . How To Model In Roblox Studio WITHOUT BLENDER Roblox Modeling


How To Create A Model In Roblox H Ng D N Chi Ti T V N Gi N 460px Make A Model In Roblox Studio Step 3 . How To Make A Model In Roblox Studio Roblox Studio YouTube Hqdefault . ROBLOX How To Create A Model Of Your Character YouTube . Roblox Tutorial How To Make Model Of Yourself YouTube . Roblox How To Create Models YouTube
How To Make A Model In Roblox Studio YouTube . How To Add Character Models To Roblox Studio Without Plugins YouTube . How To Make A Model Of Yourself In Roblox Studio YouTube . How To Create A Model Of Yourself In Roblox Studio YouTube . TUTORIAL How To Make A Model Of YOURSELF In Roblox Studio SUPER EASY


How To Make And Upload A MODEL Roblox Tutorial YouTube . How To Make A Model In Roblox YouTube . How To Create You Own Model In Roblox Studio 2020 SUPER EASY YouTube . Easiest Way To Create Models For Roblox Games Activate Beta AI Texture In Roblox.webp. How To Rig Models On Roblox Studio 2022 Still Works In 2026 Simple 4


Roblox Studio Make A Model In Roblox Studio Step 10 . How To Make A Model Of Yourself Roblox Studio Tutorial YouTube . 460px Make A Model In Roblox Studio Step 8 . How To Rig Models In Roblox Studio 2025 YouTube . Tutorial 1 How To Make A Model In Roblox Studio YouTube Hqdefault